Showing posts with label Effects. Show all posts

Sunday, June 16, 2013

Review: Prezi makes it easy to create cinematic presentations with zoom and pan effects

AppId is over the quota
Prezi Prezi is fun to use, and the presentations you can make with it are fun to watch.

Download Now

Traditional slide-based presentations are just that: Traditional. You could have fantastic visuals, but no matter how fancy (or austerely minimalistic) each slide is, it remains a slide. Prezi (various prices, starting at free) tries to change this by turning your presentation into a wide-open canvas on which you can draw your ideas spatially, and then presenting them by zooming and panning all over the canvas. Used well, the end result feels cinematic and engaging in a way traditional presentations rarely are.

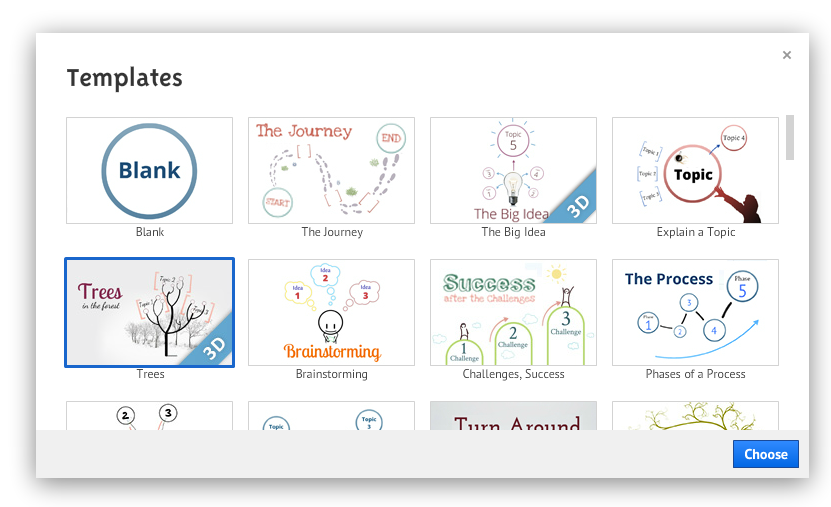
Prezi offers over 50 templates to get you started.

To get you started, Prezi shows a list of templates you could use. There are an ample number of templates, but there is no way to preview what a template looks like except by starting a project with it. If you start a project with a template and find out it doesn't work for you after all, you can switch over to a different template midway through, but you will have to adjust things to work in the new template.

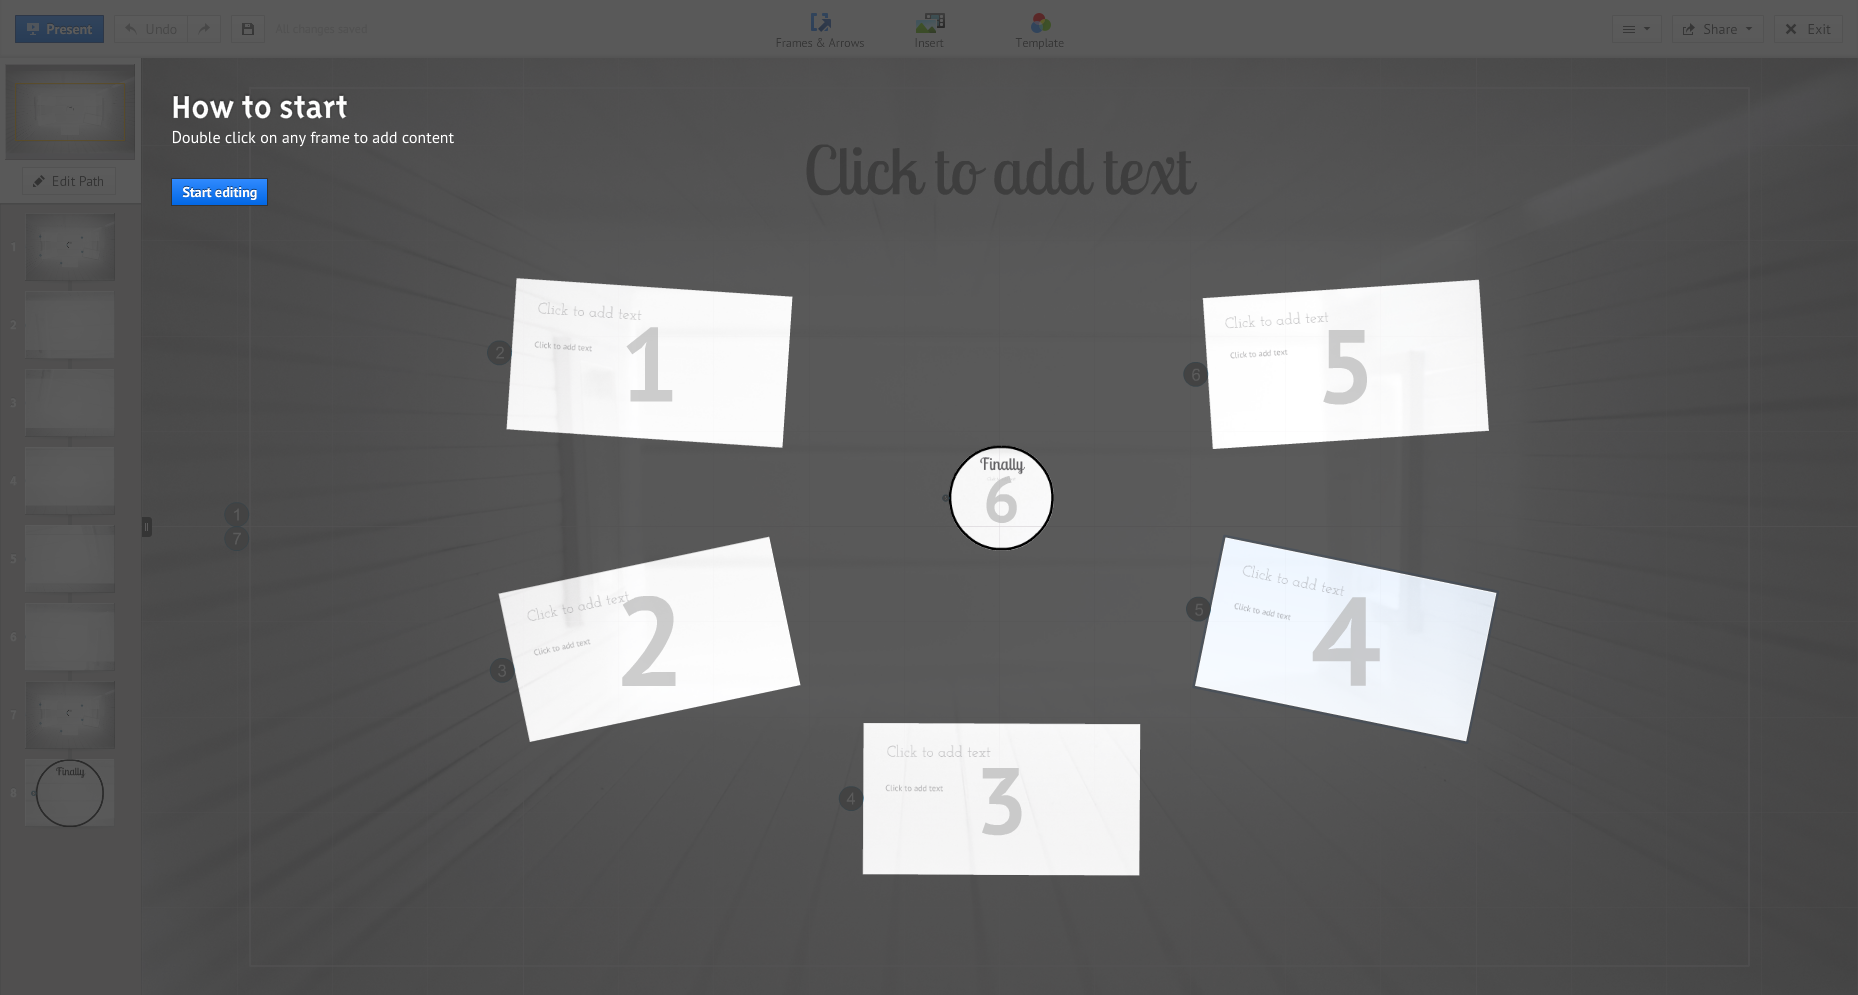
Prezi uses a canvas, but makes it easy to see how a presentation flows.

Prezi's canvas-based nature means that you create the presentation where you'll be showing it. If you want to zoom and pan somewhere when presenting, you'll have to zoom and pan while editing, so you instantly get a feel for what your audience will see. Instead of "slides," Prezi uses "path points": saved states for your presentation, where the viewport shows a portion of the canvas.

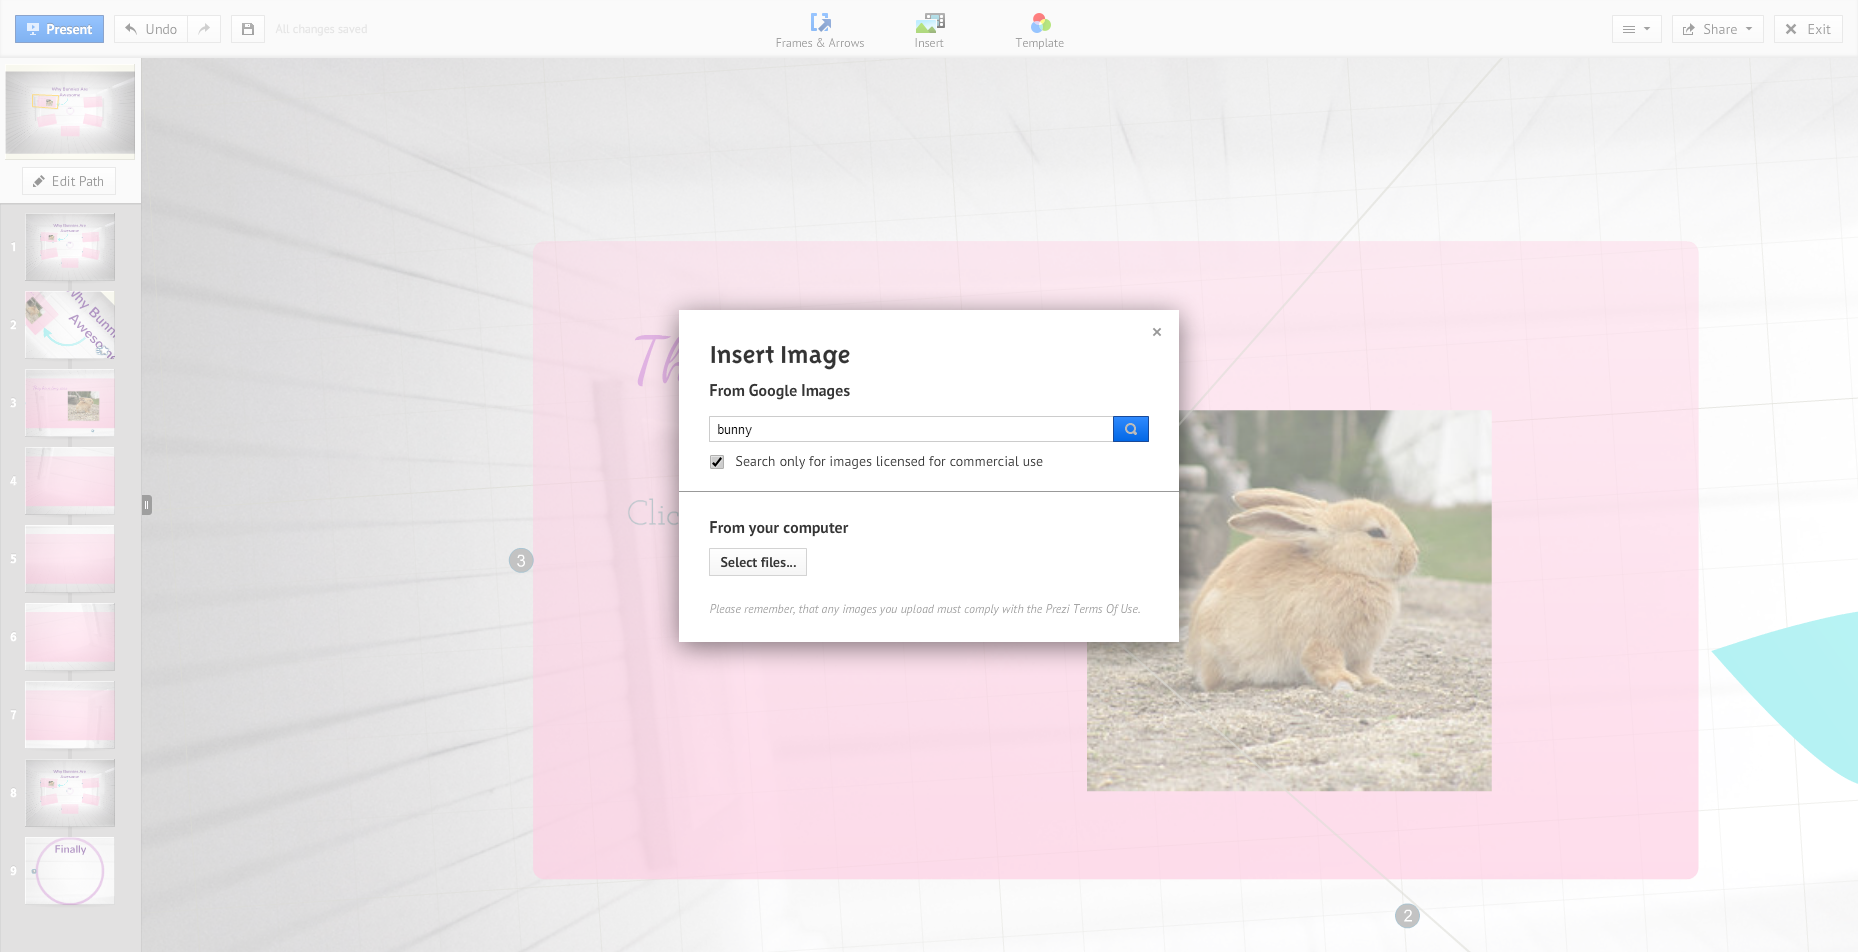
It is easy to insert images using a built-in Google Images search, or from your local computer.

As you present, you move through a progression of these path points, with Prezi automatically animating things as needed. If a given path point covers a small area of the canvas, Prezi will smoothly zoom into it, revealing new details as needed. If the next path point is all the way across the canvas, Prezi will smoothly pan there.

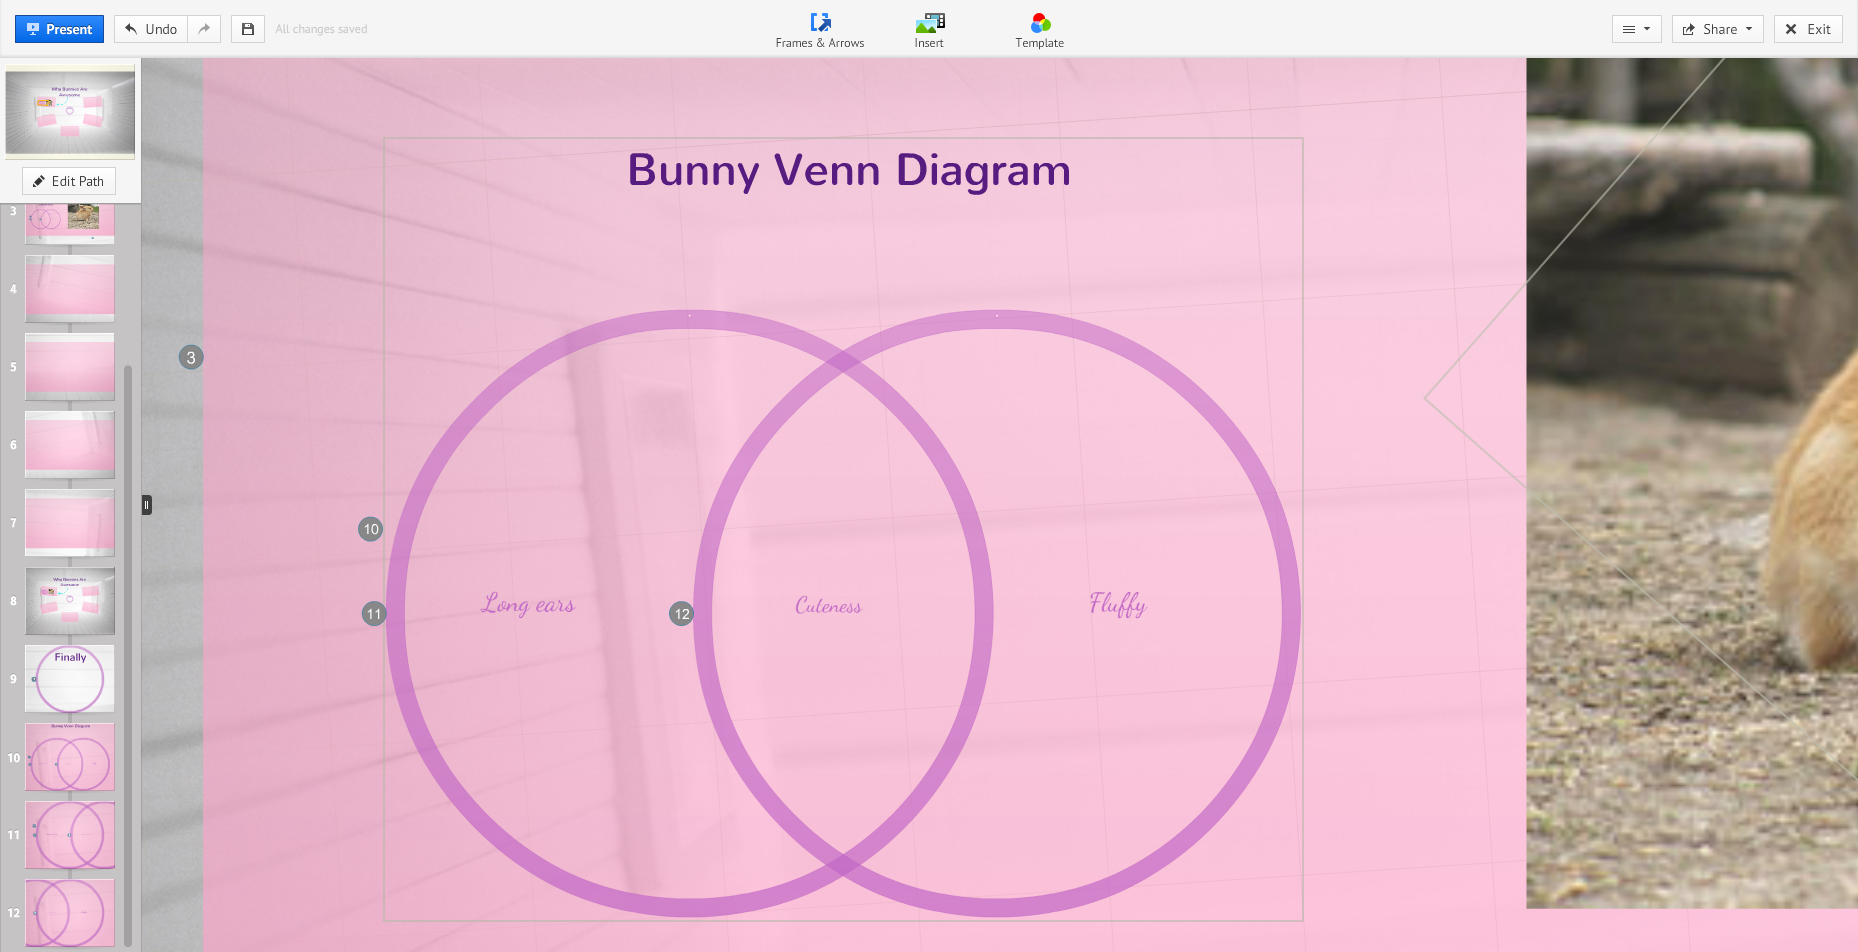
Prezi offers built-in diagrams.

I found Prezi easy and intuitive to work with, without much of a learning curve. When I had to insert an image, it let me search Google Images right from within Prezi, and I could tell it to only look for images that are okay to use commercially. You can also embed YouTube videos, as well as content from your local computer. A recent Prezi feature is the addition of sound: You can now upload sound clips to go along with your presentation, or even narrate the entire presentation so that it can stand on its own.

Instead of slides, your presentation flows along path points, which you can change and edit as needed.

Internet connections have a tendency to flake out at just the wrong moment, especially in a busy convention center. To avoid potentially embarrassing situations, Prezi lets you download your presentation for offline viewing. The presentation is packaged as a Zip archive, with a small executable player.

Prezi lets you present to others online.

Prezi is available in three different plans, starting with a free Public plan. I tested the $4.92/month Enjoy plan. The $13.25/month Pro plan is the only one that lets you work offline.

A big part of Prezi's appeal is that it's still unusual. It is likely your audience is used to slide-based presentations, so Prezi's cinematic nature would wow them. In time, if Prezi or similar products become commonplace, it may lose its visual edge. Until that happens, Prezi is an almost surefire way to create an engaging, surprising, and beautiful presentation.

Note: The Download button takes you to the vendor's site, where you can use the latest version of this Web-based software.


View the original article here

Sunday, September 16, 2012

Use five simple ways to make picture effects, save photos to Ho-Hum

Error in deserializing body of reply message for operation 'Translate'. The maximum string content length quota (8192) has been exceeded while reading XML data. This quota may be increased by changing the MaxStringContentLength property on the XmlDictionaryReaderQuotas object used when creating the XML reader. Line 1, position 9263.
Error in deserializing body of reply message for operation 'Translate'. The maximum string content length quota (8192) has been exceeded while reading XML data. This quota may be increased by changing the MaxStringContentLength property on the XmlDictionaryReaderQuotas object used when creating the XML reader. Line 1, position 9572.

(Guest blogger Cynthia Hartwig, co-owner of Two Pens, teaches business people how to write social media content from both sides of the brain. Follow @twopens2 or the Two Pens blog at http://www.twopens.com.)

Use Picture Effects in WordHave you ever skipped a meeting and then gotten nominated to take on a task because you weren't there to defend yourself?

Yep. My rowing club asked me to create a club calendar "with my great photos."

Problem is, while I'm great at words, I'm an amateur photographer, at best. I like snapping photos but I miss more than I hit.

 So imagine my delight when I discovered Picture Tools in Word 2010 which helped me make-over my images. To start glitzing them up, I just selected each one in turn so as to display the Picture Tools Format tab on the Ribbon.


Then I got to work. If you're less than a photo pro, like me, you can use these five easy tips for changing a snapshop into something snappier.

Take a look at the "before" shot of me and my Conibear Rowing Club pals "tying-in" to our quad before practice. It's a sweet, smiley shot but it's like 9 million other shots taken in the flat light of gray Seattle. Dull.


Before:  Cynthia Hartwig (front) and other Conibear Rowing Club masters tie-in to a quad on a gray Seattle day. Light is flat.

After inserting the photo into my document, I went to the Ribbon and selected Picture Tools, then I chose Color to brighten my shot. Word gave me lots of options for increasing color saturation. After clicking and evaluating several saturation choices, I ended up picking a thumbnail with 100% saturation This gave my photo a nice warm pop; options beyond 100% made us look like we were rowing to Disneyland instead of Lake Washington (a clue to back off on color adjustment!).

The last step was to go back to Picture Tools and select a middle range of Brightness and Contrast in Corrections. To do this, I chose Picture Correction Options and used my mouse to slide the cursor to the correction I wanted. Live Preview helped me choose the setting that made the blacks look really black.


 After:  I counteracted the gray light by increasing Color saturation. Now the photo pops.

Here's a snapshot I took of one of our rowing shells powering up in practice. It's a bland shot. Not much to recommend it because of its busy composition and so-so-lighting. But if you look closer at the rowers, the shot does have some nice drama. Three rowers in this boat shell are pulling all out and their oars are making a nice backsplash.

Before:  Your eye doesn't know whether to look at the rowers or the boat behind them.

I chose the Crop tool and cut out all the other extraneous (and distracting) information. Your eye knows where to look with this crop and you get the excitement of the moment with the expressions and the splash. Then I did the same thing I did above: I went into Picture Tools, chose Color and increased the color saturation slightly for some zing.


After:  I cropped in on three rowers with the most action and splash. Now you know where to look.

In late January, we Conibears celebrate our achievements at an annual award party. I like this silly snapshot demonstrating a gag idea for lighting up our boats on dark Seattle mornings. One club member wears a full yellow body suit lit with Christmas tree lights; another holds up the white option. The original photo was dark because it was taken inside at night.


Before:  This shot of a gag skit at the rowers' awards party was taken indoors. It's dark and dreary.  

Highlighting the Christmas tree lights seemed like a good way to show off the idea of the photo, so I went to Picture Tools and chose Corrections. Then I increased the contrast by selecting a thumbnail in Brighten and Contrast. I felt that the faces and room could reasonably go dark because there's enough detail in the photo to show you the scene. By increasing the brightness, I was able to give the Christmas tree lights a bright glow that enhances the idea of the photo. As a last step, I also chose a thumbnail under Corrections and chose Sharpen and Soften to give the photo better detail.


After:  I bumped the Contrast up to make the lights the brightest element in the shot. Now the gag idea of "lighting up the dark" works.

Conibear Rowing Club raises money every year for Rainier Valley Rowers (RVR), a nonprofit organization which provides scholarships to kids of all income level to learn to row. I wanted to emphasize the diversity of RVR rowers so I spent time in Picture Tools trying out a wide range of color effects. I went into Tone in the Color section, and picked the thumbnail that gave me the best balance of skin tones of the Asian, Hispanic, African-American, Caucasian and Eritrean kids in the boat. I made sure to pick the tone that also kept the warm reds and yellows of the fall leaves in the background. Voila: instant United Nations.


 Before:  The Rainier Valley Rowers look slightly washed out and the colors fall in the cool, blue tones.

After:  To warm up the photo and emphasize the full range of skin tones, I used the Tone selection in Word 2010 Picture Tools. This helped bring out the fall leaves in the background.

Conibear Rowers don't wear elk horns or buffalo heads but we do initiate our new officers with the ritual of "crossing under the oars." I snapped this photo at the awards ceremony and had a problem with the indoor lighting and outside darkness. Consequently, the photo came out soft, a little blurry and full of noise. Rather than fighting the noise, I decided to increase it for a grainy effect by increasing in Brightness and Contrast under Color Corrections. I also upped the Color Saturation by picking a thumbnail that looked good. To counteract the lack of detail and blur, I adjusted the image (by 50%) using Sharpen under Corrections so the facial expressions were distinct.

After:  The dark shot taken at the initiation of the club officers was blurry so I sharpened it.

Not bad for "word" processing software! Now if only Word 2010 could represent me at the next Conibear Club meeting before I get "volunteered" to redo our website. :-)

-- Cynthia Hartwig is co-owner of Two Pens, which teaches business people how to write social media content from both sides of the brain. @twopens2


View the original article here

Thursday, September 13, 2012

関連書籍:After Effects CS6マスターブック

????:After Effects CS6??????? « Focus In blog function clearSearch() {document.search_form.s.value = "";} .recentcomments a{display:inline !important;padding:0 !important;margin:0 !important;}adobe.com      Focus In blog / ????:After Effects CS6???????by Seigo Furuta  

View the original article here

Friday, August 31, 2012

plug-ins for After Effects CS6

plug-ins for After Effects CS6 « After Effects region of interest function clearSearch() {document.search_form.s.value = "";} .recentcomments a{display:inline !important;padding:0 !important;margin:0 !important;}adobe.com      After Effects region of interest / plug-ins for After Effects CS6by Todd Kopriva  

View the original article here

書籍:作例で学ぶAfter Effectsエフェクト百科

??:?????After Effects??????? « Focus In blog function clearSearch() {document.search_form.s.value = "";} .recentcomments a{display:inline !important;padding:0 !important;margin:0 !important;}adobe.com      Focus In blog / ??:?????After Effects???????by Seigo Furuta  

View the original article here

Saturday, May 19, 2012

free After Effects template projects

free After Effects template projects « After Effects region of interest function clearSearch() {document.search_form.s.value = "";} .recentcomments a{display:inline !important;padding:0 !important;margin:0 !important;}adobe.com      After Effects region of interest / free After Effects template projectsby Todd Kopriva  

View the original article here

Friday, February 17, 2012

Andrew Devis tutorials for Adobe After Effects

Andrew Devis tutorials for Adobe After Effects « Kevin Monahan function clearSearch() {document.search_form.s.value = "";} .recentcomments a{display:inline !important;padding:0 !important;margin:0 !important;}adobe.com      Kevin Monahan / Andrew Devis tutorials for Adobe After Effectsby kmonahan  

View the original article here

Friday, May 27, 2011

After effects Animation Tutorial - Assistants and layers


Alongside the basics of animation that are easy to implement in After Effects, "wizards" are provided to help you the next step in the development of your animation. It is the ideal time to learn and begin to implement layers too.

The layers are just what they sound like and if you use other graphic products such as Photoshop or Fireworks, you'll be familiar with the concept of the layer. Layers allow you to place different objects in your scene, on their own "layer".

This gives you the freedom to treat differently, to give these different actors of their own personality. We believe that provide a background color or a parameter for your stage backdrops and mattes.The action of your animation may well involve the different actors.

Even a simple logo unfolding on stage may play with a waterfall or Sunrise, a motorcycle zoom in the center of the stage or instructor in your tutorial to address the audience. All of these "players" will be put on their own layer and each layer has its own definition, including what is perhaps the most fundamental, and this is where it appears on the timeline, where this object enters your animation.

Because we are mixing layers and assistants in this tutorial we are going back to wizards for a moment. We have learned about the wizard of motion sketch, in our last article how to register the movement and animation of your object by simply followed the path as you would on a piece of paper. This method is very easy to use, very easy to visualize, but it lacks a bit of finesse. This is where appear the two assistants: the "smoother" and "auto-orient".

The ' softness ', as it's name implies, adjusts the speed and distance of the keyframes that you created by tracing with motion sketch. " In the same way, it is virtually impossible to hold your camera still perfectly when you take a photo, it is almost impossible to draw a path without a bit of hand movement "gittery." Once you have designed and reviewed your sketch of query, choose the more smooth, under window > smoother. Select all your images position key simply by selecting the position under your animated objects property and click "apply" under the smoother options. That's all. You will see the number of keyframes reduced and your path will be "smoothed". If you increase the tolerance on the smoother, it will help further reduce the number of key frames. Like most settings in After Effects, the best way to determine what works best for you and this particular animation is to try some different parameters. Play with it a little bit and then run your movie and observe how this wizard refined your animation.

Another wizard who belongs to this lesson is the wizard rotation auto-orient. It is also a fairly intuitive tool. Imagine a bird or a plane, a cruise along a winding road car. Animate the motion would only seem comic if your car was not always directed along the path. Auto-Orient (choose layer > transform > Auto-Orient) offer an "Orient long path" option that will keep your object aligned on the front movement. Your car will be appear to be oriented along the path, it follows, as your bird or airplane.

These simple wizards help your refine your animation, save you time and help to create a control that would be very difficult to create manually by setting each keyframe yourself. Experience with animation assistants and you will appreciate their ease of use and simple contributions.

Next? We will learn more about layers!


Full moons, Dogcreek, think globally, act locally.

Web Designer Tom Womack uses Adobe Design Suite, creation of dynamic sites with rich media.

Adobe After Effects is my application of choice with unlimited possibilities. I use Premiere Pro for video editing, Flash to the latest compatible film Web. I'm on a learning curve constant and regularly update my media page.

http://webforu2.com
http://webforu2.com/weblog


Thursday, April 21, 2011

improved trial version for After Effects CS5.5

improved trial version for After Effects CS5.5 « After Effects region of interest function clearSearch() {document.search_form.s.value = "";} .recentcomments a{display:inline !important;padding:0 !important;margin:0 !important;}adobe.com      After Effects region of interest / improved trial version for After Effects CS5.5by Todd Kopriva  

View the original article here

Monday, April 18, 2011

Save project from After Effects CS5.5 for After Effects CS5

Save project from After Effects CS5.5 for After Effects CS5 « After Effects region of interest function clearSearch() {document.search_form.s.value = "";} .recentcomments a{display:inline !important;padding:0 !important;margin:0 !important;}adobe.com      After Effects region of interest / Save project from After Effects CS5.5 for After Effects CS5by Todd Kopriva  

View the original article here

Saturday, April 16, 2011

After Effects CS5 10.0.2 Update

After Effects CS5 10.0.2 Update « Adobe Creative Suite Updates function clearSearch() {document.search_form.s.value = "";} adobe.com      Adobe Creative Suite Updates / After Effects CS5 10.0.2 Updateby Jody RodgersAfter Effects (1)Bug Fixes (1)Patch (1)Update (1)  

View the original article here