Showing posts with label automatically. Show all posts

Wednesday, July 17, 2013

Automatically plot multiple pieces of online data in your Excel spreadsheet

AppId is over the quota

This post on exploring Webservice functions is brought to you by Lee Bizek, a Program Manager in the Excel Team. 

Automatically plot multiple pieces of online data in your Excel spreadsheet If you’ve ever wanted to incorporate data from online resources into Excel spreadsheets, now you can with the new Webservice function. With this new feature, you can add information such as stock quotes, weather, Bing Search results or even Twitter feeds to your spreadsheets—and you can make the information update automatically. In this post, we'll discuss some of the more advanced aspects of the Webservice function.

I’m starting with a spreadsheet I created to organize a group camping trip that includes the latest weather information from the internet. In this example, being aware of online weather updates helped us to prepare for the elements and also predict high and low tides because we wanted to go crabbing as part of the adventure. I’ll show you how to take this spreadsheet a step further to use the =FILTERXML(xml, xpath) to extract multiple records of data from the XML string with an array. This will allow you to automatically plot multiple pieces of data in your spreadsheet.  

Note: Before you start the exercise, be sure to review how to use Webservice functions to automatically update Excel 2013 spreadsheets with online data so that you know how to:

Use a =WEBSERVICE(url) function to get dataUse the =FILTERXML(xml, xpath) function to extract a single piece of data from the XML string

We’re going to set up a Webservice function call to the URL for the 10-day weather forecast and then pull out the details from the XML string. To do this, follow these steps: 

1. Open the example file Kamping 2013 – Start and Complete Sample Files.zip located at the end of this post (click the icon next to Attachment).

2. Go to http://www.wunderground.com/weather/api/d/docs?d=data/forecast10day to get the URL for the 10-day forecast. At the bottom of the page, you’ll see an example URL.

3. Copy the example URL and paste it into your Webservice function in cell B11 of your spreadsheet. (Note: Be sure to replace the API key and location information in the URL to the cell reference we used to incorporate data from an external source so that you can control the API key and zip code for both Webservice functions in the same place.)

4. In your Excel spreadsheet, select cell range B14:B23.

5. Click the Formula Editor Box and then type: 

=DATEVALUE(CONCATENATE(FILTERXML(B11, "//date//month"), "/", FILTERXML(B11, "//date//day")))

In this example, I am pulling out the month and day, CONCATENATING them together and then converting the string to a DATEVALUE.

6. Press CTRL + SHIFT + ENTER to execute the array. This action adds the brackets { } that indicate it is an array. Find more information about array formulas here.

7. Select cell range C14:C23, then type: =FILTERXML(B11, "//high//fahrenheit")

8. Press CTRL + SHIFT + ENTER for the high temperature.

9. Select cell range D14:D23, then type: =FILTERXML(B11, "//low//fahrenheit")

10. Press CTRL + SHIFT + ENTER for the low temperature.

11. Select cell range E14:E23, then type: =FILTERXML(B11, "//conditions")

12. Press CTRL + SHIFT + ENTER for the conditions.


Note: To edit the formula, select all of the cells in the array, then click the Formula Editor. Press CTRL + SHIFT + ENTER to execute the new formula.

WEBSERVICE Functions are “non-volatile”, which means they refresh only when:

A referenced cell is edited

The entire workbook is refreshed (CTRL + ALT + F9)

Some text strings include spaces or non-URL-friendly characters instead of URL-friendly characters such as a zip code. You can still use the URL in the WEBSERVICE function, but it’s best to encode the string first. Use the =ENCODEURL(text) function to include text searches into your WEBSERVICE function URL. Learn more about ENCODEURL function here.


Now we are better prepared for packing and planning our crabbing activities!

--Lee Bizek, Excel Program Manager

Download the full example file Kamping 2013 – Start and Complete Sample Files.zip attached below. The example file also utilizes the tide data and includes XPATH filters in the WEBSERVICE Functions. Remember you can use this functionality for many different web services to pull in data that you can then analyze using Excel.

To use the web service in this example, go to www.wunderground.com and register for their Weather API to get your own API key. Once you have your API key, add it to the Weather tab. All WSF calls in the file will use this cell reference in the URL.


View the original article here

Wednesday, June 19, 2013

Review: Wappwolf automatically converts and synchronizes your files

Wappwolf Wappwolf converted and automatically synchronizes files and puts in a predefined folder.

Download now

Automation is the name of the game these days for Web applications, and Wappwolf aims to combine automation with the power of cloud computing.  Available for dropbox, Google drive and box, the Wappwolf offers on-the-fly conversion, as well as automatically move files to other folder animals, email alerts, Tweets, FTP upload and more. And once you have set the rule, everything behind the scenes is done.

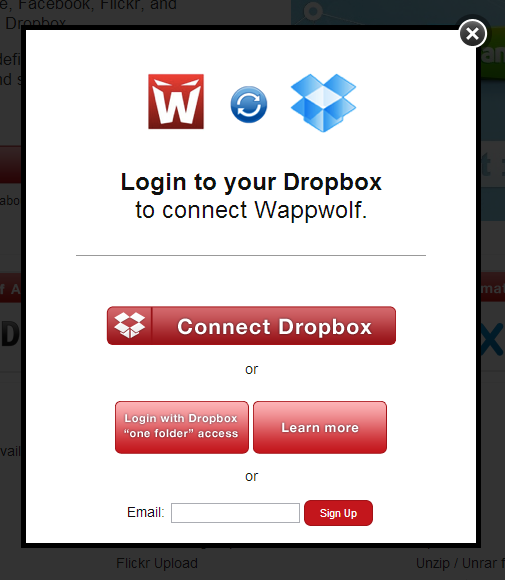
First with Wappwolf, you sign with your dropbox login information and creates a special Wappwolf folder in your dropbox account be.

Alhough some options premium be paid, there is still much for the free basic users, their teeth to get. Free basic users can have up to 10 automation and 100 files of 100 MB per day. But when you pay $5 a month, you get unlimited automation and 1,000 files with 1,000 MB per day.

Before you do anything, you must first visit the Web site Wappwolf and choose the cloud service would like to use with the service. You must then sign in Wappwolf with your cloud computing credentials. In the event that Wappwolf give the entire test run your cloud computing account is scary to you, you can instead restrict its access to only one folder in your account.  And of course it goes without saying that you can at any time revoke Wappwolfs access to your cloud computing account.

After you sign in successfully, a special Wappwolf folder will be your cloud account.  This is where all the action will take place. If you perform an Automation rule, you can subfolder for each rule, so no worries about things, to make getting there really messy.

To start, just click on "create a new automated" and you will be prompted to select a folder (or create a new).  If you put a file in this folder, then the automatic conversion and action is done on the basis of the next step of the rule.

Every time, when you create a rule in the list of automation, with the ability to delete this rule and an upgrade to a paid plan for more options appears.

To set up this part of the rule, you will be... with all the automation options and there are a lot.  The sections are arbitrary file documents, pictures, audio, video, and send info expanded.  So, if the Automation "Convert to Kindle" means he would go then to the section "Documents" next set portion of the rule.  Click on "send to your Kindle", whereupon the file format and your Kindle email address to specify.

If the Automation "convert to JPG" then called the pictures section, select the image of your next port of call, where, what you want would be dealt to.  The same applies to audio and video. Select the action that you want performed. You get the idea. It is not at all difficult, and of course anything that you can do easily deleted and restored.  So that it does not damage the options messing around and see what you come with.

"All files" is particularly interesting because it offers a wide range of options, including email, file encrypt / decrypt them, pack / unpack it, or upload of the data into another cloud service.  You can even set up file folders automatically send out tweets, to generate Facebook status or a Goo.gl short URL.

To pay for the premium service, you would have to be a very great Automator and Converter: I have more than enough to be 10 automation. And the conversion features that paid such as MP3 conversion, can easily be performed by free alternatives (without the file automation, which also offers Wappwolf).

I would like to hear whether you think that this is a better conversion service as some of the competing services out there you in the comments. Is the automation of part of the service of the extra icing on the cake or something, it's beautiful, but completely unnecessary?

Note: The download button takes you to the manufacturers website where you can download the latest version of the software.


View the original article here

Friday, May 10, 2013

Use Web services to automatically update Excel spreadsheets with online data

This post on the research of Web service functions is brought to you by Lee Bizek, Program Manager on the Excel team.

Have you ever wish, data from online resources in your Excel spreadsheets, or even Twitter RSS feeds such as such as stock quotes, weather, Bing search results include? With new Web Services features, now you can.

I used to coordinate anonymous editing in Excel Web , which some people outdoors to sleep in tents required collaboration with a group, a 20-person camping trip. Aware online weather updates being helped to prepare for the elements and also make predictions because we crabbing as part of adventure wanted to go high and low tides.

With Excel-2013 for the desktop, we moved weather and tide information from the Internet to Excel using the =WEBSERVICE(url)--function and the most beautiful is automatically updated information!

Learn how to use the WebService function, we will do 2 things:

A =WEBSERVICE(url)-Funktion that use to get the DataUse = FILTERXML (XML, XPath) function to extract a piece of data from the XML string

First, find a Web service. In this example with weather updates, go to http://www.wunderground.com/weather/api to create your free account. Fill the form, and click sign up for an API key.

To set up your API key, follow these steps:

Select either the Cumulus to plan or the anvil plan, depending on what you prefer. Choose which option you prefer for the addon history. Works in this example since we no historical information use either option.Select Developer. Note: The other options also work for this example, but there is a fee, the associated with them.Click on Refresh plan.Click on the top of the page, documentation.Found on the left navigation bar, titled API table of contents of data features heading, then click under the heading conditions.(You can go also http://www.wunderground.com/weather/api/d/docs?d=data/conditions)Scroll to the bottom of the page, then copy the URL in the box shown examples. (The URL format will look like this: http://api.wunderground.com/api/[APIKey]/conditions/q/CA/San_Francisco.json). The example URL will contain your unique API key.

Now have a unique API key, open your Excel spreadsheet file and follow these steps create the =WEBSERVICE(url)-Funktion for the current weather conditions:

In cell B5, type = WebService(URL). Then, replace the URL with the unique URL, including your API key, which you have just copied. Both sides of the URL add quotation marks. The format will look like this: to replace, then at the end of the URL "http://api.wunderground.com/api/[APIKey]/conditions/q/CA/San_Francisco.json" country and the city in the URL with a zip code .xml to. The formula in cell B5 should look like this: =WEBSERVICE("http://api.wunderground.com/api/[APIKey]/conditions/[ZipCode].xml") [apischluessel] your will be unique API key, and the [ZIP code] for the desired location weather updates. Press enter or return. The formula returns an XML string from the Web service.

You can use also the cell references in the Web service function to URL parameter, such as your zip code, for example, to update.  Here's how to set it up:

Add your API key in cell B1. Enter in the name fieldapischluessel to the cell to name a few.  In cell B2, type the zip code. Type in the name ZipCode field to mention the cell. Create your WEB SERVICE function with cell references. ("The formula should be in this format: = WEBSERVICE("http://api.wunderground.com/api/ "& APIkey &"/ conditions/q/ZipCode & ".xml") copy and paste the entire formula in cell B5. Update your zip code and then you will see the update of your WEB SERVICE function URL.

Now we have the information from the Web service in the Excel spreadsheet, we need to extract the data, what, who want we from the XML, including the name of the city and current temperature and current weather. To extract the data, follow these steps:

1. The =FILTERXML(B5,"//full")-Funktion type cell B8. This will give you the city name is associated with the zip code.


2. Enter cell C8, = FILTERXML (B5, "//temp_f"), to extract the current temperature in Fahrenheit.


3. In cell D8, type = FILTERXML (B5, "/ / weather") to see the current weather conditions, such as light rain.

Our camping trip planning collaboration table looks now with the online weather updates:

Please keep in mind that WEB services are "non-volatile", which means that they only have to update:

A referenced cell is updated EditedThe entire workbook (CTRL + ALT + F9)

Remember that you can use this functionality for many different Web services over the Internet, which you can then analyze by using Excel.

--Lee Bizek, Excel program manager

Learn more about the WEB SERVICE function

Learn more about the FILTERXML function

Learn more about XPATH


View the original article here

Friday, April 12, 2013

Review: Automatically resize images on the fly with Robosizer

AppId is over the quota

If you are in the habit of sending images by email, you will know what an absolute pain in the neck it is to go through the tedious process of resizing them to send. It takes up precious timethat  could be better spent using, looking at cute cat pictures on Reddit. You know, more important stuff.

Robosizer is a free software app that sits in your Windows tray, and detects when you are sending an image via one of its supported email programs. When it does it will automatically resize the image for you (leaving the original image intact), according to the pre-set sizes that you specified in the settings beforehand. Robosizer really is a “set-and-forget-it” type of program. Pretty soon, you’ll forget that it is even there (if you switch the notification balloons off).

When Robosizer detects that an image is being sent, it will resize it to the specifications you set, and you will receive a notification bubble telling you it is being done


Installation is a breeze, with no devious toolbars or other nasty software trying to sneak in. When the installation has been completed, however, you will be invited to enter a serial code. It looks as if Robosizer used to be a paid app, but it’s now free. So look in your installation folder, and you will see a text file with a free activation code. Just enter that and you’ll be good to go. The developer has assured me that this minor nuisance will be removed soon.

When you start it up, you will see a little robot face sitting in your Windows tray. Right-click that and choose the settings. It’s here that you need to set up your “profiles” – in other words, the settings for each program. A wide range are covered, (including Firefox, Gmail and Skype) so you are sure to find a few things there that you already use. At the time of writing, Internet Explorer 10 on Windows 8 is not supported, but the developer is working on fixing that.

Robosizer works with a wide range of popular services such as Gmail, Facebook, Chrome, Firefox, Opera, Outlook and many others..


To set up your profile, drop the menu down and choose one. If your program is not there (and Robosizer supports it), click “new”, type the name of the program, and a new profile will be set up for you. You will then see boxes for the “max image width” and “max image height”. You can enter either one or both, in pixels. You can also specify whether or not the height or width should be “enforced”. By that, it means that when resizing, do you want it to specifically focus on the width, the height, or neither? Then specify which file types will be resized (there’s a startling lack of support for GIF images). Rinse and repeat for other profiles. When they have all been completed, click “close” for Robosizer to go back to snoozing in the Windows tray, waiting for an image.

When it spots an image being attached to an email, Robosizer will spring into action, resizing the image and inserting it into your email message. You will get a notification balloon telling you it’s currently going on  and your original image stays in its original location with its size untouched. The resized version sits in Robosizer’s cache folder (the location of which you will find in the “program settings” tab of the Robosizer app). Bear in mind though that these resized images are deleted when you “exit the program or restart the computer”. So if you want to keep copies, do it right away.

I test a lot of stuff out for PC World and I mostly delete it all afterwards when the review is done. But Robosizer is staying put on my computer as it is extremely useful. No longer will I gnash my teeth in frustration when I realize that the enormous David Hasselhoff picture I want to send to someone is needs to be resized. Robosizer, my new friend, will take care of that for me. Thanks Robosizer. You’re my pal. But you won’t be my  BFF until you get along with GIF images.

Note: The Download button on the Product Information page takes you to the vendor's site, where you can download the latest version of the software.

Mark O'Neill

Expatriate Scotsman now living in Wurzburg, Germany, freelance writer, frustrated future bestselling author, obsessed bibliophile. Other interests include trying to understand The Architect in the Matrix movies, decrypting codes and ciphers, and trying to persuade my landlord and my wife to let me have a Highland Cow for a pet.
More by Mark O'Neill


View the original article here

Monday, February 13, 2012

LiveCycle Output ES2: “Failure to automatically determine column ’5′ width”

Issue

If you are using LiveCycle Output to generate PDF documents using XDP files as input, you may encounter the following exception and no PDF will be returned:

0000012a XMLFormAgentW E com.adobe.livecycle.formsservice.logging.FormsLogger logMessageALC-OUT-002-017: mid,tid: 29435,23593162.1 sev: f text: Failure to automatically determine column '8' width.0000012a FormServerExc E com.adobe.livecycle.formsservice.logging.FormsLogger logMessageALC-OUT-002-013: XMLFormFactory, PAexecute failure: "(com.adobe.document.xmlform.ReturnStatus@39133913)Failure to automatically determine column '5' width."

If you load the same XDP file in Designer ES2 and goto PDF Preview, you may notice the same message as a warning in the log, but the PDF will be correctly rendered and displayed:

Failure to automatically determine column '5' width

——-

Read the full article at http://blogs.adobe.com/dmcmahon/2012/02/04/livecycle-output-es2-failure-to-automatically-determine-column-5-width/.

This entry was posted by moderator on February 10, 2012 at 7:08 am, and is filed under FAQ, LiveCycle Enterprise Suite. Follow any responses to this post through RSS 2.0. You can skip to the end and leave a response. Pinging is currently not allowed.


View the original article here